
UV DTF 3D RIP software
Textured UV DTF is one of the few jobs still done blind: you print it and you find out about the relief when you peel it. Sapiens CoreFlow RIP has a mode built for it.
What UV DTF 3D is
UV DTF 3D is UV DTF printing with real relief added: on top of the colour, layers of varnish are printed and built up over the design until the texture can be felt. Height comes from the layers; the pattern comes from the texture applied to each area.
It differs from plain UV DTF in that plain UV DTF is flat: it transfers colour onto a rigid surface and stops there. And it differs from textile DTF in the substrate and the ink: DTF goes onto a garment with heat-cured ink and adhesive powder, while UV DTF goes onto glass, metal, plastic or cardboard with UV-cured ink.
Today it is work done almost blind, because the available RIPs are built for textile DTF and resolve white by luminance. Sapiens CoreFlow RIP has a dedicated mode: it treats each area as its own white or varnish channel, with its own density, and shows the relief in three dimensions before you spend film.
The problem with textured UV DTF
In UV DTF, white and varnish are not automatic backing: they are material placed exactly where you decide, and it is their build-up that creates texture you can feel.
RIPs designed for textile DTF derive white from luminance, which is precisely what does not work here. That is why UV DTF 3D mode treats each area as a channel of its own.
Channels by area, not by luminance
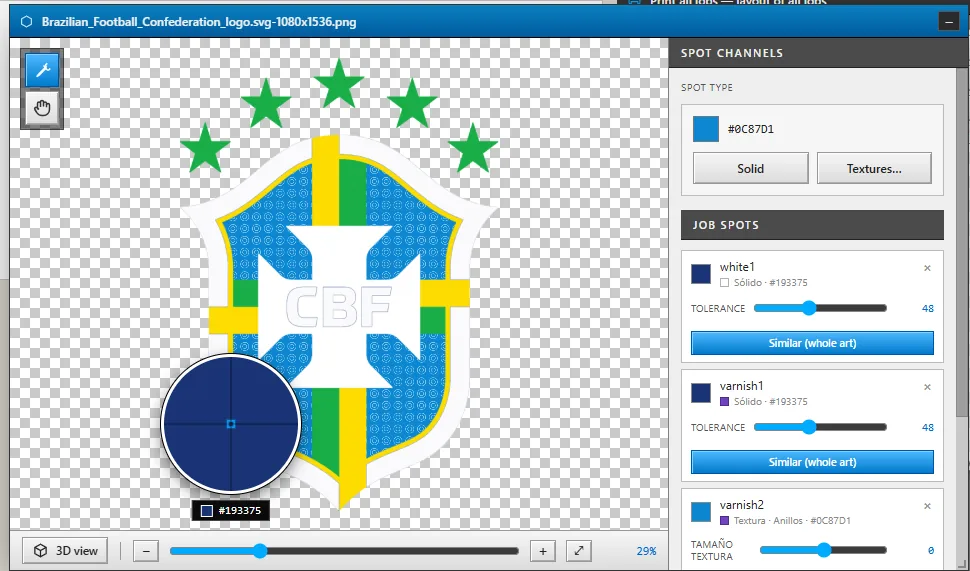
You pick a colour from the artwork with the eyedropper — magnified, so you hit the right pixel — and that area becomes a white or varnish channel. You can keep it to the patch you clicked or extend it to every part of the art with that colour.
Each channel carries its own tolerance, type (solid or texture) and density. Channels add up: that is how height is built.
Textures and 3D preview
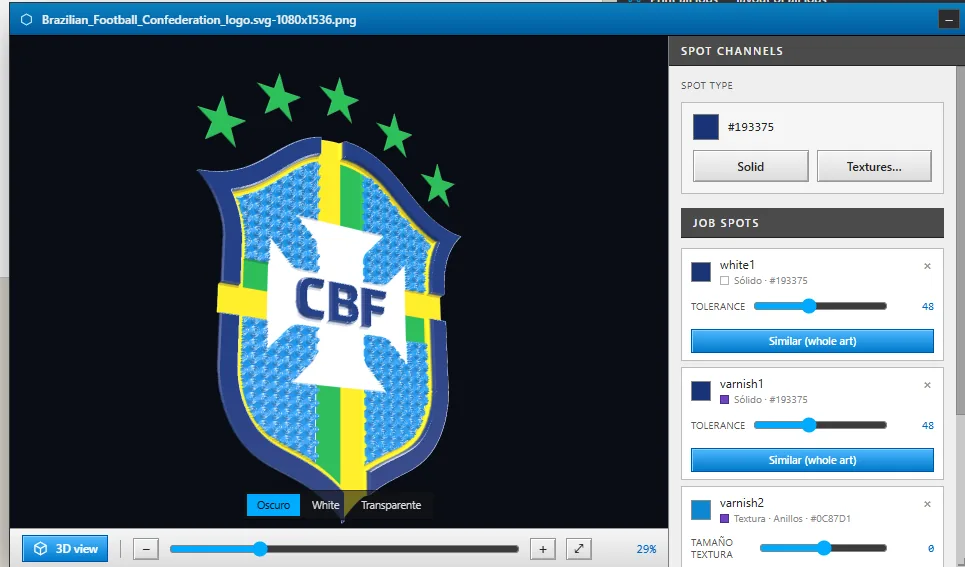
The texture library provides the pattern — diamonds, dots, rings, weaves — and the scale is set per channel. You can also load your own textures.
Before spending film, the three-dimensional view shows the result with its relief and its gloss: varnish reflects light while white stays matte, and you can rotate the piece.
Embroidery: relief that reads as stitching
UV DTF 3D mode includes an automatic embroidery digitiser: it turns the artwork into varnish stitches in relief, with no need to draw them by hand or go through embroidery software.
You pick the stitch type and the height, and Sapiens CoreFlow RIP generates the path over the area you select or over the whole artwork at once. What makes it read as embroidery rather than a lump of varnish is the gap between stitches: the space left between one stitch and the next is what creates the shadow and the volume the eye recognises.
- Six stitch types — the character of the embroidery to suit the artwork.
- Height by area — the relief comes from stacked varnish layers.
- Gap between stitches — the spacing that gives it realism.
- Embroider the whole artwork — apply the effect in one go, instead of area by area.
- Lit 2D and 3D preview — judge the stitching before spending material.
Rigid and textile
UV DTF 3D mode works for rigid substrates and for textile. Layout, cutting and the job queue are the same as in DTF mode, so a shop doing both does not change program or habits: it changes mode.
Thread relief, under the light
This is the real height map the embroidery produces: the same one the white (relief) and varnish (gloss) spots come from. Move the mouse over it to change the light and see how the gap between stitches makes it read as thread.
 Move the mouse: the light follows
Frequently asked questions
Where does the height of the relief come from?
From material building up: in Sapiens CoreFlow RIP the varnish channels add together and each contributes its density, so the real height comes from the layers. The texture defines the pattern, not the height.
Can I use my own textures?
Yes. Besides the catalogue bundled with Sapiens CoreFlow RIP you can load your own image and use it as a texture pattern, applied by area over the design.
Can I do an embroidery effect without embroidery software?
Yes. UV DTF 3D mode in Sapiens CoreFlow RIP includes an automatic embroidery digitiser that turns the artwork into varnish stitches: six stitch types, height by area and a gap between stitches, which is what gives it realism. You do not need embroidery software or to draw the stitches by hand.
Is the 3D view faithful to the print?
It is a preview: the 3D view in Sapiens CoreFlow RIP lets you judge pattern, area and the contrast between matte and gloss before spending material. The final result also depends on the machine, the varnish and the material.
How is UV DTF different from textile DTF?
In the substrate and the ink. Textile DTF goes onto a garment, with heat-cured ink and adhesive powder. UV DTF goes onto rigid surfaces — glass, metal, plastic, cardboard — with UV-cured ink and no press. Sapiens CoreFlow RIP covers both, with independent modes.
Which materials can UV DTF 3D be applied to?
Rigid, smooth surfaces: glass, metal, plastic, cardboard or treated wood. The adhesive on the film does the work, so no heat and no press are needed. The UV DTF 3D mode in Sapiens CoreFlow RIP also works for textile, with the same gang sheet and the same job queue.
What machine do I need for UV DTF 3D?
A UV DTF printer with a varnish channel alongside colour and white, and a BYHX or HOSON board so Sapiens CoreFlow RIP can write it the native PRN. Varnish is the sixth channel of the PRN and is enabled per machine profile. On Roland it prints layered relief with the driver included as standard.
Do I need other software for cutting?
No. Contour cutting and the cutter file come out of the same program: Sapiens CoreFlow RIP generates the bleed, the contour line and the PLT with registration marks, without going through a separate vector editor.